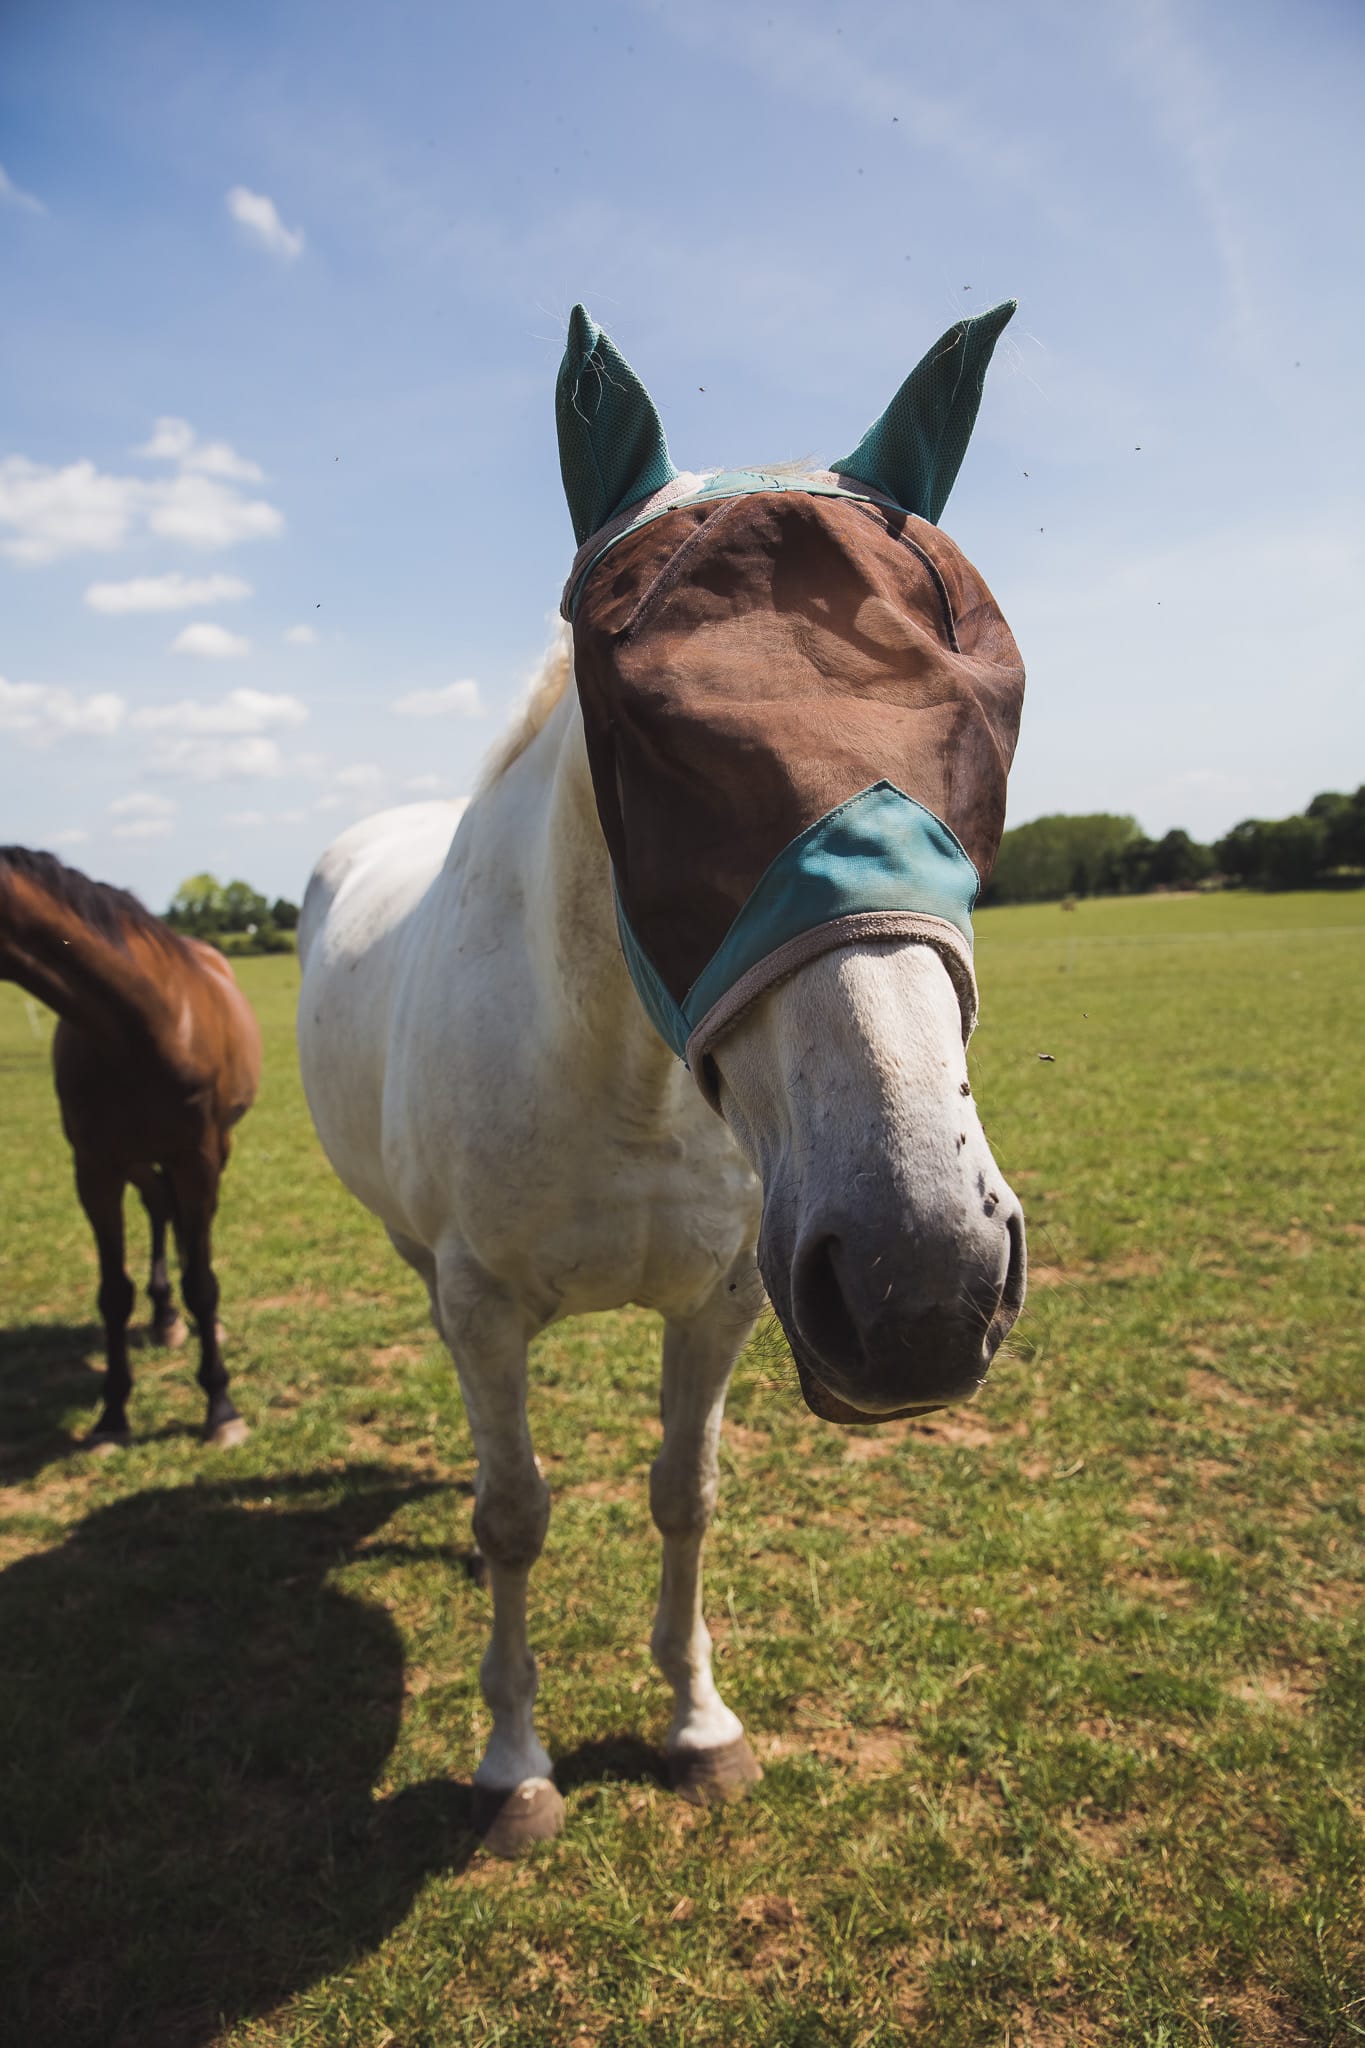
Have you noticed when taking a photo of your horse with your phone that their head is huge, and I mean HUGE? Yes you’re not going mad it will look disproportionally hug. This is due to something called perspective distortion. There are two main types of distortion that occur when taking a photo and they have both similar and different linked effects. The first is perspective distortion and the second optical. Optical is broken into the sub categories of barrel, pin and moustache distortion.
Optical Distortion
Firstly let’s discuss optical or lens distortion which is created due to the optics of the glass inside the lens. If you’ve not seen the glass inside they are not flat but instead have curves. The curve varies on each according to the lens focal width. Commonly wide angle lenses create barrel distortion and telephoto lens pincushion distortion. A small selection of mainly older, but some modern lenses create moustache distortion.
With all three types of optical distortion, if you were to imagine a grid of squares overlaid on the image you would see a different distortions pattern. In all though the centre vertical and horizontal lines will be straight.
Barrel distortion is as it sounds, shaped like a barrel. Imagine the middle of each side being pulled out away from the centre. Pincushion is the opposite where the centre of each side is pushed in. Moustache is a combination of the two and the hardest to deal with as the distortion can be very irregular.
The amount of distortion all three create is actually normally quite minimal except at the very widest focal lengths. Optical distortion is often blamed incorrectly for the effects of perspective distortion which is far more noticeable.
The suggested ideal focal length where optical distortion is minimal is somewhere around 200mm but honestly is minimal from 50mm up.
Image below left is a straight out of camera 24mm image showing barrel distortion and associated vignette. Below right (or second image if viewing on a mobile) shows the corrected image using only Lightroom corrections. Even at 24mm, as there are no straight lines to highlight it the barrel distortion is minimal.


Correcting Optical distortion
But fear not optical distortion is normally very easy to correct. Most mainstream lenses will have a lens correction profile. They are available with popular editing programs to apply to an image with the click of a button. The metadata from your camera will tell the program the lens used so you only need to click to confirm application.
But actually sometimes distortion is good and desirable so you don’t always have to correct it. The prime example of this is when using a fisheye lens. They are designed to push barrel distortion to the limits as a desired effect. You wouldn’t purposefully use a fisheye lens, then try and correct the distortion, it’s an artistic choice.

What is perspective distortion
The often misunderstood distortion is perspective. It is not caused by the camera or lens, but your position in relation to the subject. Often people call it lens or focal length distortion which is incorrect.
If we step away from cameras entirely and think about what we see with our own eyes instead it can be easier to understand. If you stood next to a very long wall, say the great wall of china, the bit of the wall you are next to will look utterly enormous, but a bit of wall a mile away will look tiny. We all know the wall is still enormous a mile away but because of our perspective to it, it looks small.
If you look at the above photo of the robin, the fence closest to the camera is big, furthest away it is small. All of it is exactly the same height but it looks smaller because it is further away. The closer you are to the object the more dramatic the distortion fall off will be from front to back.
People get confused and think the lens is creating the distortion which is inaccurate. If you choose a position and then take several photos at different focal lengths in the same position, you will see the same level of distortion in each photo. The photo to the right/below shows an image taken at 24mm with a crop window applied. That same image cropped is then below next to a 42mm image slightly cropped and a 70mm uncropped image. As you can see they are essentially identical. There is no change in distortion, because my distance between the horse did not change between them.


So where should you stand and what lens should you use to avoid perspective distortion?
Once you understand how perspective distortion affects how you see an object, it allows you to select the appropriate lens for your subject. The simplest way is walk back until your subject looks in proportion and normal. For a horse I would want to be standing at least 10 metres back possibly a bit more. It will depend on if I’m shooting the whole horse or just it’s head. Now I am in position I think about what I want my image to look like in the frame. Do I want the horse to fill the frame? Do I want it with lots of surroundings? If I want it to fill the frame I am going to want to use something 70mm+. If I want to include scenery I’m going to rock a 24mm!
The bigger the object the further back you will need to stand. For buildings you are likely to meet issues with vertical perspective distortion wherever you stand, unless miles away! On the most part unless a specialist architectural photographer it’s not a huge worry. If it is, you can use a tilt-shift lens which is designed to specifically counteract the effects of perspective distortion. Be warned though they are not cheap!
You may be wondering what focal length do we see in? The answer is the eye sees at 22mm. BUT given to lots of clever science in reality it is closest to the effects of a 50mm lens. I would though rarely shoot a portrait at 50mm as it is not the most flattering! For humans for a head only portrait I would shoot at at least 70mm. For horses 100mm, but I often shoot at 200mm as I like the subtle effects of compression. At 200mm you will get more background blur/bokeh than you will at 70mm. You must weigh up which elements are most important to your artistic vision. The right/below image was shot at 200mm but with the angle etc does not show notable compression distortion.

What if I can’t stand where I want/need to stand?
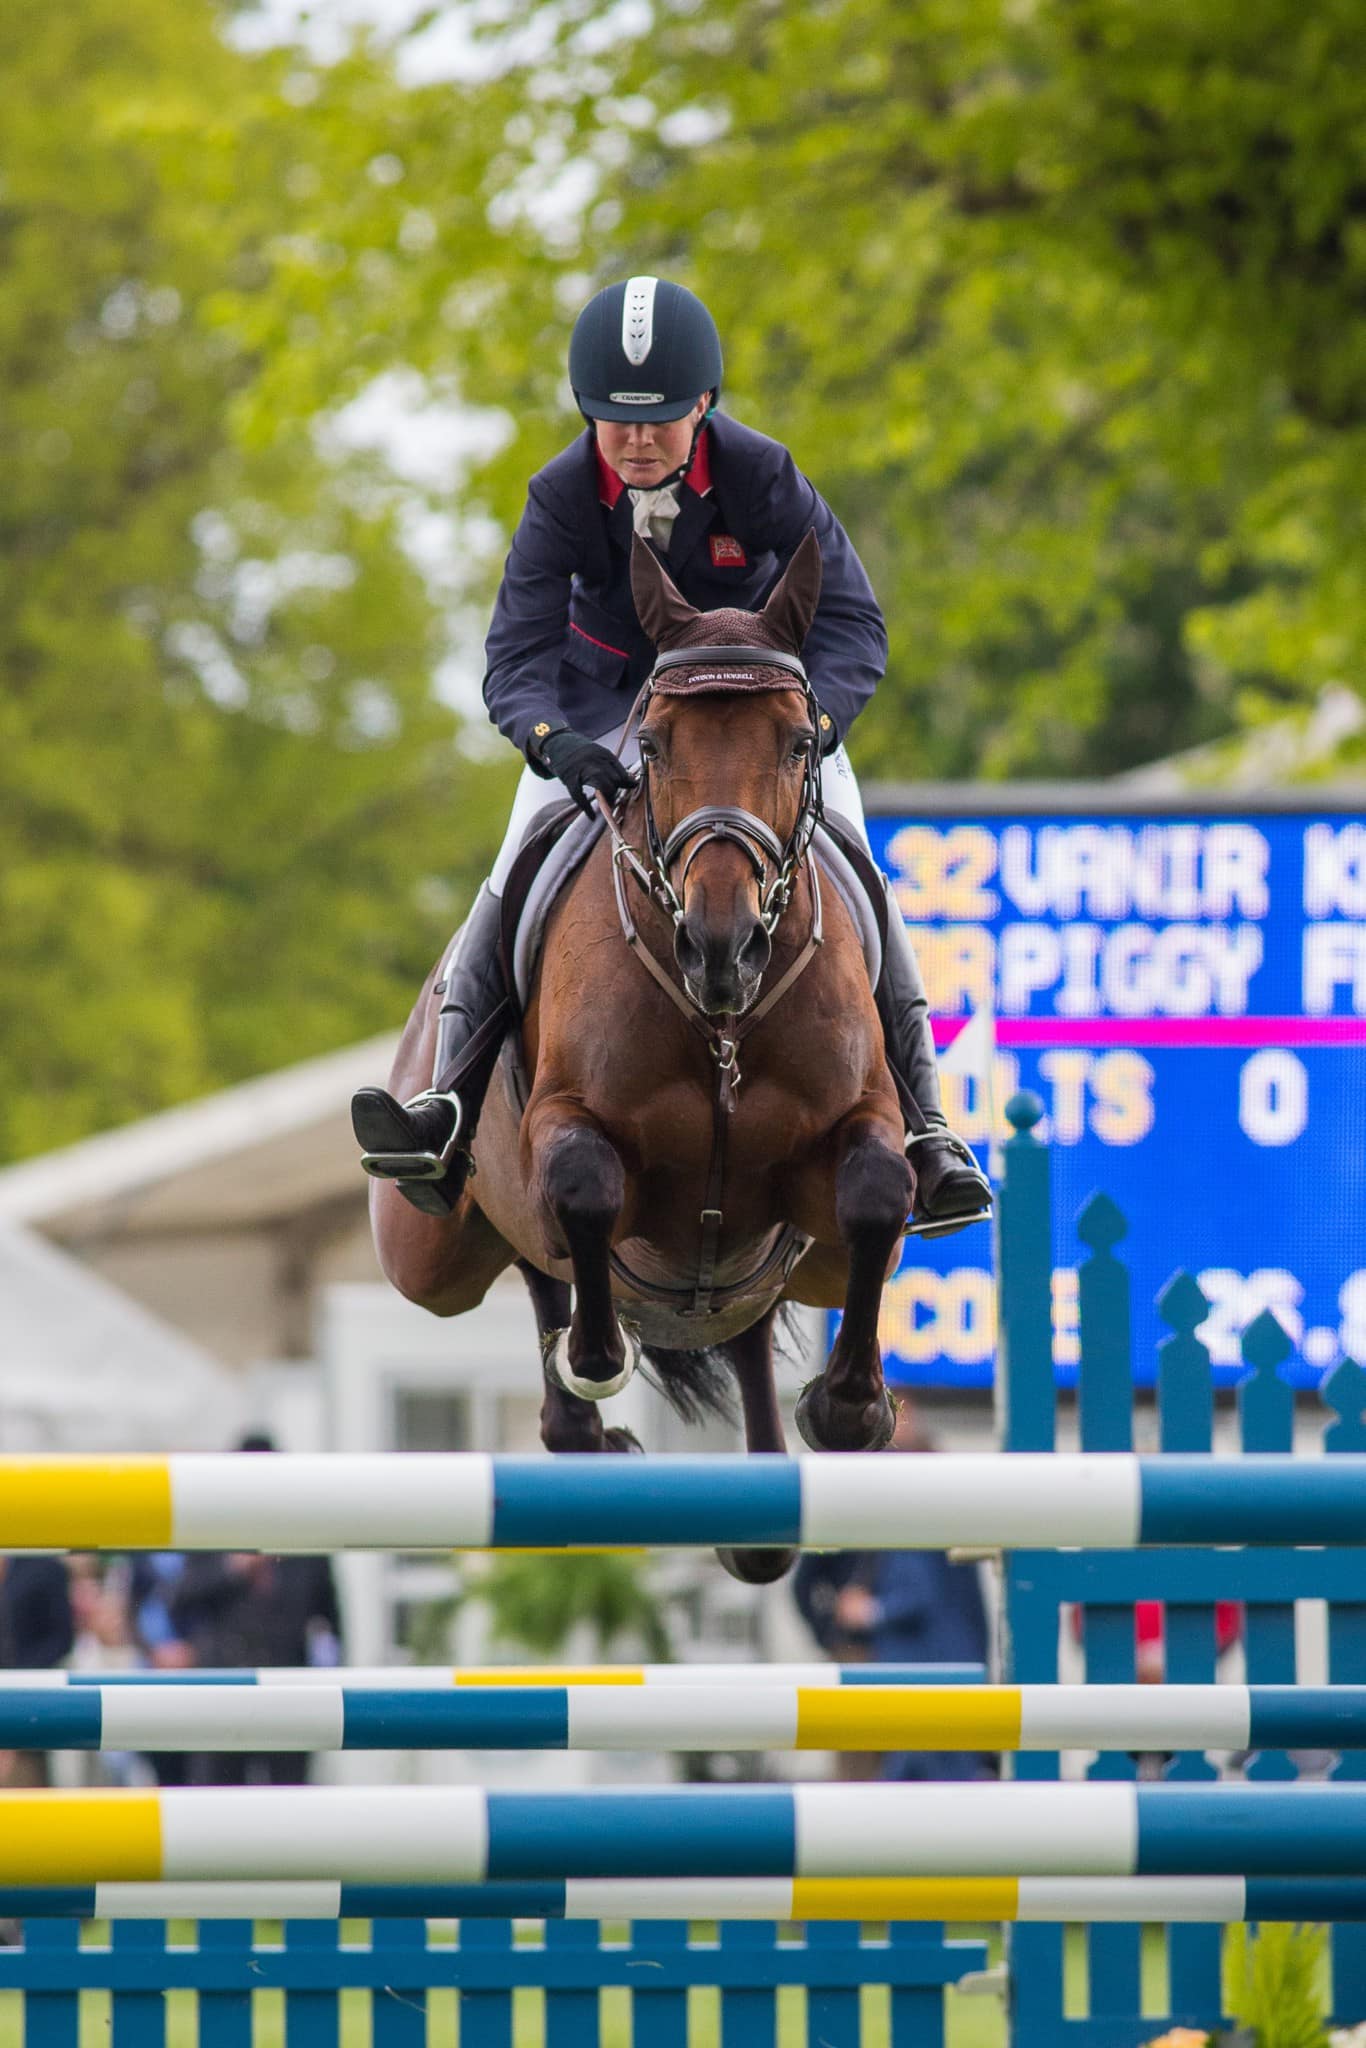
If you have to stand further away than the ‘ideal’ viewing point you will start seeing compression. This won’t be that noticeable unless using a much longer focal length. The compression effect basically makes two points seem closer together than they actually are. Again this is caused by your position in relation to the objects, not by the lens. Look at a mountain range from many many miles away and the mountain peaks will look like they are on top of each other. In reality they are potentially miles apart. All you do with a long zoom lens (300mm+) is make the effect more noticeable. The further away you are from something the closer two objects in front of one another will look, but it’s most obvious when you zoom in.
Take this image right (below) if you look carefully the horse is actually jumping the middle element of a combination, not the last. You can see poles from all three parts which are between 7-11m between one another. As this was shot at 400mm the gaps between them look smaller than they actually are. 99% of the time compression is not going to be an issue for you. It can make a horse/object look ‘stouter’ than it actually is. I would leave your 300mm+ lenses for sport images when you really need them. Aka when you can’t stand close enough to your subject to use a 70-200mm!

If in doubt, in brief…
If you’re still not sure about what lens you should be using or how close to stand do the following. If you’re shooting a portrait use a lens somewhere 70-200mm and then stand somewhere where you can fit all of the horse/person in the frame. Humans for a close up portrait look closest to reality at around 70mm, for horses aim a little longer at 100mm. No matter your subject up to 200mm you can’t go far wrong and overall you may get overall a more aesthetically pleasing image.
If you don’t have a lens circa 70-200mm you will need to still stand in the same position then crop the resulting image out of camera. Do not stand closer to the object to compensate.
Do you want to learn more?
I have a range of articles covering both the basics and more in depth areas of photography (see below!). Plus I also offer 1-2-1 mentoring and training.


